4 Blue LEDs (I used Radio Shack part #276-311 which are rated at 300 mcd's, handle 30 mA and use 5 volts)
80 Ohm resistor rated to handle at least 1.5 watts of power (or an equivalent combination)
Solder and Soldering Iron
Small guage wire (20-24 should be good)
Spade-type connectors (optional)
Shrink Tubing/Electrical Tape
Very Fine Sandpaper (I used a 400 grit cloth)
Utility Knife, Wire Cutters, Wire Strippers, Pliers
Assortment of Phillips and Flat Blade Screwdrivers
7/32" Drill Bit (optional)
Wire Taps (optional)
Step 1:
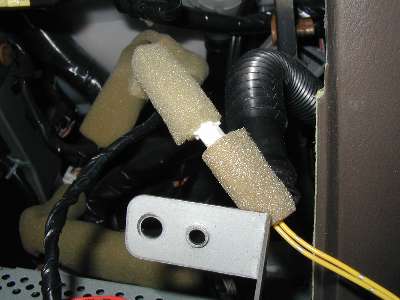
Remove the Climate Control Unit from your car. This is done by following the same procedure you use to remove your stereo. Once you get to the climate control, you need to unplug the tubing and large white connector from the back. A few inches away from the unit the yellow wires out the back will go into a harness that can be undone. On my car, the harness was wrapped in foam.
Now, using a flat bladed screwdriver, remove the back cover from the unit. Using a phillips screwdriver, carefully remove the 4 bulbs from the unit (they are the 4 brown plastic things with a phillips pattern on them). To remove them, twise them with a screwdriver and then you can pull them out (or tip it upsidedown and they will fall out). DO NOT LOSE THESE, you will need the brown plastic pieces later.
Step 2:
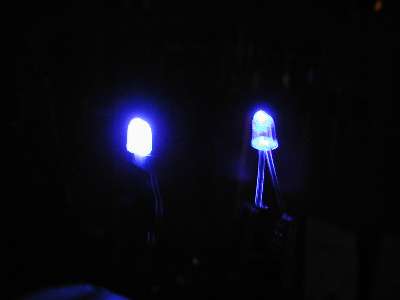
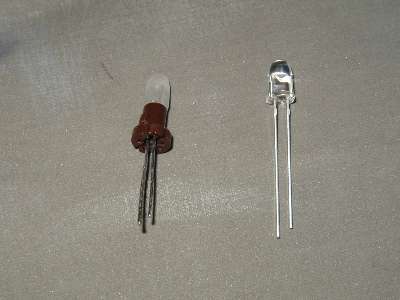
Take the 4 LEDs you have and use the utility knife to trim off the little ring around the bottom. Once you have trimmed off enough, the LED will slide smoothly in and out of the holes left in the circuit board when you removed the original lights. Once you have done that, use the sandpaper to roughen the surface of the bulb. Incandescent lamps emit much more light to the sides than LEDs, so by using the snadpaper to roughen the plastic casing, much more light will be diffused to the sides of the bulb. Below is a comparison of the original LED (right) and one after I trimmed and sanded it (left), both lit and unlit. NOTE: Keep track of which side of the LED is the positive/negative lead. If you wire it up backwards, the LED won't light up. The negative lead is the one that is attached to the little dish inside the LED.
Step 3:
As shown in the above picture, you now need to remove the original lamps from the brown plastic holders and replace them with LEDs. To remove the original lamp, unwrap the leads from the bottom and simply pull the lamp out. The leads from the LED should fit into the holes already there, and you can use a dab of glue to hold the LED on the holder.
Step 4:
You are now just about ready to put the LEDs into the unit. If you notice, right now the LEDs wont stay in the board because the plastic holders won't tighten. You can solve this by putting a thin piece of paper between the circuit board and the holder. I used a 7/32" drill to make the hole, but I'm sure there are other ways. Make four little squares with holes in the middle, and you can now put the LEDs in the board.
![]()
Step 5:
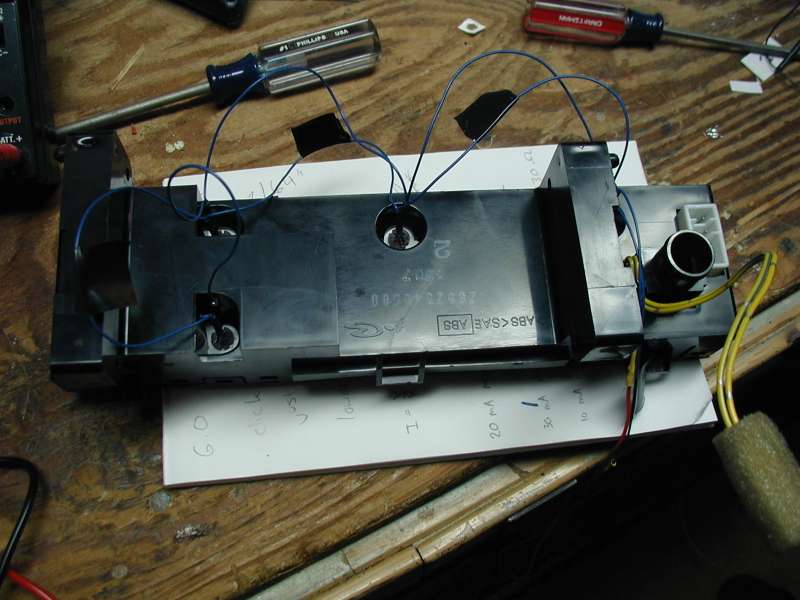
This step is where I got lucky. The LEDs need to be wired together in parallel. I chose to put the wires outside the unit, as there are already holes in the back of it. I had some small jumper wires that already had connectors that fit over the leads on the LEDs. If you are not that lucky, you will need to do some soldering in this step (bear in mind if you solder here and ever want to take the back off the climate control at a later date, you will have to unsolder everything). You need to solder the negative leads of all the LEDs together and do the same with the positive leads. MAKE SURE you don't mix these up. If you have red and black wire, that is good (I only had red wire, so I used electrical tape to mark the negative one). Make sure you leave some extra wire on the ends. Below is a picture of my unit after I put it together and attached wires to the leads (click on it for a larger version).
Step 6:
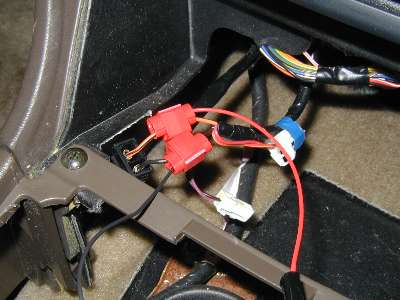
Now that you've finished with the climate control unit, you need to find a power source in the car. You'll notice that we didn't use the circuit board to get power for the LEDs. This is because the power supplied to the original lights varied with the dimmer. In order for the LEDs to be at the optimum brightness, we are going to need a constant power supply. I decided to get my power from the cigarettte lighter, since that only recieves power when the car is turned on. However, this has the effect of the climate control lighting up even if the headlights are off. I used some wire taps I got at Radio Shack to grab some power. Below is a picture of the taps when they are in place. You will want to get two more pieces of wire to use here, and different colors would also be useful. If you don't have wire taps, you could use solder here instead. Be sure you find out which wire is positive and which wire is negative (the one with more black should be negative, but you might want to test with a multimeter to make sure).
Step 7:
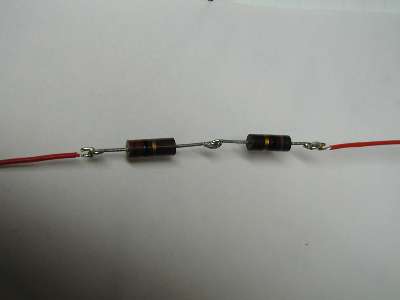
Now its time to use the resistor(s) you bought. Here's how I decided on 80 Ohms: The car/cigarete lighter provides 12 volts of eletricity, and I measured the LEDs as using 4 volts. That leaves 8 volts that have to be used in our circuit. You may also remember that our LEDs are rated to handle 30 mA, so to be on the safe side we'll load them with 25 mA (we don't want to blow them out). Also, since there are 4 LEDs, we end up with a total current of 100 mA (25 x 4) or .1 Amps. Since I=V/R, we end up with .1=8/R, or R=80 Ohms. The reisitor also should be rated to handle at least 1.5 watts. We will be putting about .8 watts through it (P=I^2 x R or P = .1^2 x 80, so P = .8), and we don't want it to get too hot. I did not have an 80 Ohm resistor, so I used a combination of two 1-watt rated resistors in series to give me about 76 Ohms of resistance. This puts a current of just over 26 mA through each LED, but it is still under the 30 mA limit. Below is a picture of the resistors I used.
NOTE: DO NOT FORGET the resistor. If you do, you will fry your LEDs. Also, you should be using a resistor for each LED, but since every LED I used is the same type, they should share the load equally, and I simplified the circuit by using only one resistor.
Step 8:
Now you need to connect wires together, and not forget to use the resistor! We have a positive and a negative wire coming from the climate control, and we have a positive and a negative wire coming from the cigarette lighter. We also have an 80 Ohm resistor. You could solder everything together at this point, but that means if you ever want to take everything apart, you'll have to do more soldering. First, attach the resistor to any one of the 4 wires (it doesn't matter, as long as it is between the power source and the LEDs). Now you need to connect the positive wires to each other, and do the same to the negative wires. I used some spade-type terminals to do this so that I can easily disconnect them if I need to. (sorry, no pic here).
Step 9:
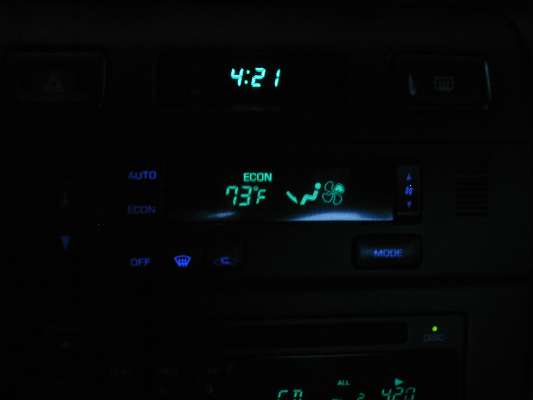
Now, you're finally ready to put everything back together. You may want to test it before you do that though. Make sure your car is somewhere dark (the lights are really hard to see during the day) and turn your accessories on. The buttons on the climate control should now glow blue. If they don't, make sure none of your connections came undone. If you see smoke and/or smell something funny, immediately turn off your car and hope you didn't destroy anything. (I was lucky :) If the buttons glow blue, then go ahead and put everything back together, and next time you're driving at night, admire your newly re-lit climate control :)
Have fun, be careful, and don't burn yourself.
Addendum:
1-6-01: In Step 2, it is very unlikely that the LED will actually fry if the poles are reversed. Added a note about stronger LEDs. Added the equation to find power to Step 7.
1-10-01: Replaced the picture of the final result with a better one. Added some additional notes about LEDs in Step 7.